2. Create a pair of virtual edges (Azure-SG-Edge1 and Azure-SG-Edge2)
2.1 Create the SD-WAN Edge in the VCO
The major purpose of this post to show how the SD-WAN Edges and form eBGP with the Route Server to provide connectivity, but not showing the detail step-by-step of how to deploy SD-WAN Edges in Azure environment. Thus, only key steps will be shown.
The following figure shows the interface setting of virtual edge Azure-SG-Edge1:
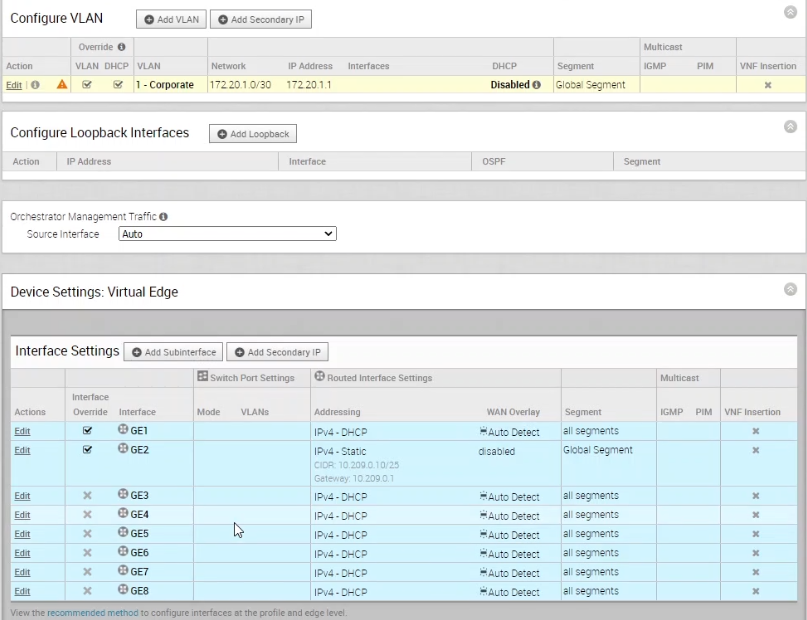
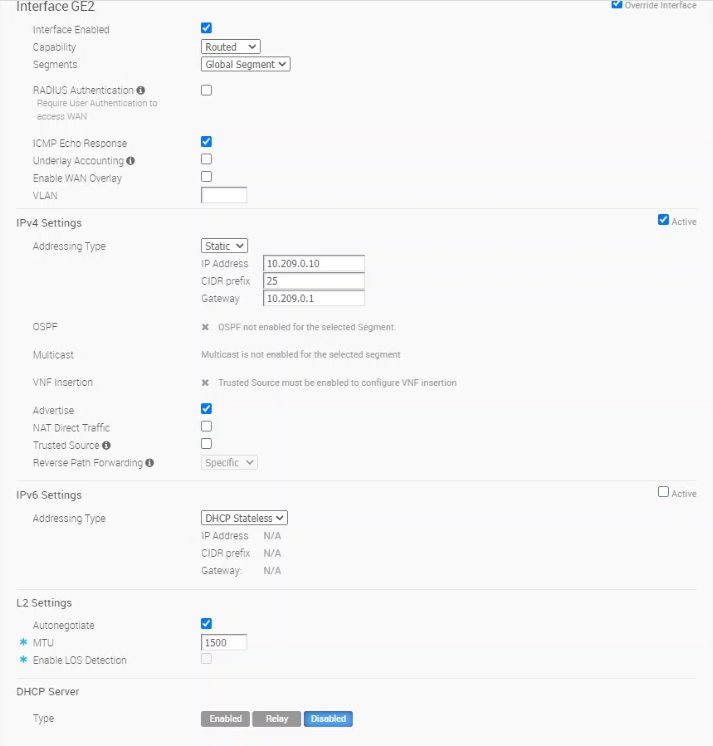
The GE1 interface will be WAN facing while GE2 interface will be LAN facing. As a result, the GE1 and GE2 both needs to be converted from switch port to routed port. GE1 will be using DHCP and Auto Detect overlay. GE2 will be using static IP (because it will form BGP peer) with overlay disabled. The following diagram shows the GE2 configuration:
2.2 Create the SD-WAN Edge in the Azure portal
After the virtual edge Azure-SG-Edge1 is created in the VCO, we can create the virtual edge in the Azure portal. The recommended way is to use Azure Resource Manager (ARM) template to create the VMware SD-WAN virtual edge in Azure environment. The template used in this post can be downloaded from here: https://code.vmware.com/samples/7633/vmware-sd-wan-azure-resource-manager-template-2-nic-only
To create the virtual edge in Azure, search by keyword “deploy” in Azure portal, and select “Deploy a custom template”. Then select “Build your own template in the editor”. There is an option called “Load file”, click on that and upload the template downloaded from the URL in previous paragraph. When the upload is completed, select “Save”. After that, some information are required to be filled:
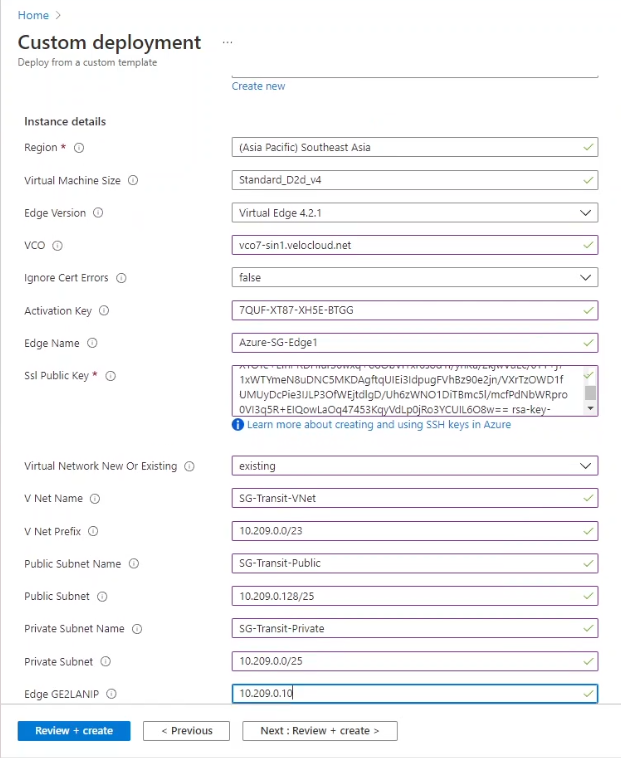
Since the VNet SG-Transit-VNet is already created, select “existing” for the “Virtual Network New Or Existing”. The public subnet is the Internet side, that is the WAN side. The private subnet is the LAN side, which is the interface forming eBGP with the Route Server. The public subnet (SG-Transit-Public) and private subnet (SG-Transit-Private) are already created when the VNet is being created, fill back the corresponding information here. Finally, the Edge GE2LANIP is the GE2 IP address, it needs to be match the IP address configured in the VCO and also fall under the private subnet, in this example, the IP address is 10.209.0.10.
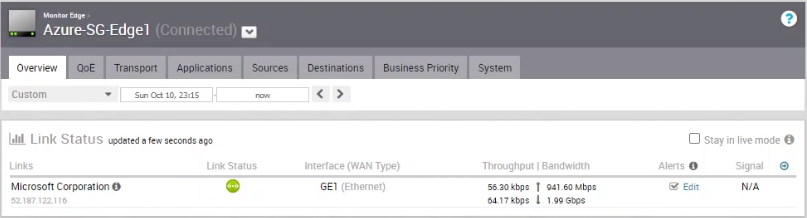
After filling all the necessary information, click “Review + create”. After the review, click “Create”. The virtual edge will be created and automatically reach out to the VCO for activation. The entire process usually takes about 3-5 minutes. If everything goes as expected, the VCO monitoring page of the virtual edge should will show the Link Status as green and the bandwidth detected successfully. Here is the Azure-SG-Edge1 status after it is being created:
The creation of Azure-SG-Edge2 is very similar to Azure-SG-Edge1, the process will not be repeated here.